Tuesday, August 31, 2010

Bridal Shower


I am invited to a bridal shower in Michigan this coming weekend for a couple who now live in Ireland. She is from Michigan and he is from Ireland. They met when they were both veterinary residents specializing in equine medicine. What an accomplished couple who have travelled all over the world to help with fowling season in the U.S. and Australia and with special surgeries for horses. Anyway, the wedding is in July, 2010 on the southern coast of Ireland and it is sure to be a fabulous event.

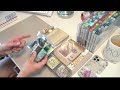
Now back to my project, the paper certainly makes this card what it is. The two birds which I thought resembled love birds are perched on a wild rose bush in front of a pastel background. I cut the image from a 12x12" paper pad made by K&Company called The Best of Brenda Walton. If you have read earlier blogs, I have used this paper successfully in several projects. I just love it. Some of the papers are very nostalgic and others complement the designs. In any event, I used another part of the paper for the inside where I printed a short verse that I found on the internet. The simple organza bow at the top adds a softness to the front of the card. I didn't know what type of sentiment to put on the card so I just cut a shower umbrella using my Cricut New Arrivals cartridge and wrote the date and the location of the shower. I think it works.

Wednesday, August 25, 2010

Cricut Cardz Challenge Design Team

I am thrilled to announce that I was chosen from many skilled crafters to join Design Team #2 at Cricut Cardz Challenge. I am really looking forward to working with some amazing crafters on both of the Cricut Cardz Challenge teams. Check out this blog that encourages crafters to test their creativity and use their Cricut machines to create cards. The results are amazing. Let's get in gear and make some fun cards. I love seeing what other crafters come up with. Come and join us each Wednesday when a new challenge is announced.

Friday, August 20, 2010

Olivia the Owl


I named this owl, Olivia. She is so cute with her yellow ribbon in her fur beside the sentiment that reads, Thinking of You. I started this card with a lovely designer paper in an orange houndstooth pattern from K&Company. The card was cut using the Wild Card Cricut Cartridge. What a wonderful image! I curled the paper up to give more dimension to the card. Then I gave her some big blue eyes. I think she turned out well.

I made this card to enter into the Cricut Cardz Challenge which was a color challenge to make a card using only orange, yellow, black, blue and white. However, I missed the deadline - silly me - so it's going into the next challenge #38 which is "Anything Goes".

Tuesday, August 17, 2010

Really Cute Card


Is this not the cutest card EVER??? K&Company has a designer paper in the The Best of Brenda Walton collection that has little girl's dresses. I used twine to resemble a clothes line and hung the dress on the line with simulated clothes pegs. I cut the cloud from paper that had several glossy cloud shapes on it. I think the scene is clean, simple and brings back memories of times gone by. The only sentiment that I thought suited the card was, "just for fun".

Monday, August 16, 2010

Back to School - soon


I just love this card!!! I started it by making my own stack of books. I started with linear patterned paper and then glued my own handcut deep U shape out of plain cardstock for the book covers. I stacked the books onto kraft colored cardstock to resemble a desk. I cut out the apple from the Plantin Schoolbook Cricut Cartridge which I think had the best apple image of all my catrdiges. The background black cardstock was used to resemble a blackboard and by adding lines and the words 'back to school' my white gel pen, I think I created a cute card that I know my counsin will appreciate receiving. She is in her second year at teaching and in few weeks, will resume teaching her grade 2 class at a new school.

I entered this card in the following Back to School challenges:
1. Paper Cutz Challenge
2. Our Creative Corner
3. The Sisterhood of Crafts
4. CCMC #111 (Create with Mary and Connie)
5. Stampin' for the Weekend Challenge #44
6. My Creative Time, Throwback Thursday Challenge #9
7. Catch the Bug - Use Primary Colors.

Saturday, August 14, 2010

Argyle Anyone?


Argyle is really an old fashioned pattern that you usually find in tennis or golf attire or in men's socks. It's popularity has come and gone but I personally find the pattern fascinating I guess because it is so complex. There are really three layers of pattern which you see in my card. The first is a background layer which I chose to be green. The next layer is more visible - mine is the mauve patterned paper and the top layer is the overall grid which in my card is white. When all assembled, the layers form a cohesive pattern that is pleasing to the eye. This card was cut using the Wild Card Cricut cartridge. I also cut the matching envelope which has a green, mauve and white lining. I edged the card with moss green and antique linen ink. I made this card for my great aunt who is 99 years old and until last year had lived in the same house for 55 years. She is still a healthy and vibrant senior in her retirement home, she had all her marbles and goes for walks about the complex 3 or 4 times daily. She is truly a marvel.

Thursday, August 12, 2010

Paper Cutz Challenge #53


The Paper Cutz Challenge this week was to make a card that included an image of a monkey, skunk, squirrel or hedgehog. Well, I just love hedgehogs I guess it's because I was born in England and they have them there but I have been in Canada since I was a child. I started with the Penny Black "Critter Party" stamp set and colored my image using copic markers. The little critter turned out well but I noticed that my photo is a little dark. I'm trying to get better at my photography. Anyway, I mounted the image on periwinkle cardstock that I cut using my scalloped circle Spellbinders Nestabilities. I mounted this on some Basic Grey designer paper from their Kioshi Paper Pad collection (just love that paper) and topped it all off with a satin ribbon and simple sentiment stamped onto the same periwinkle cardstock. Hope they like this card at Paper Cutz.

Wednesday, August 11, 2010

Wedding Congratulations Card


I made this card for an upcoming wedding. I took plain white cardstock and embossed it in my Cuttlebug using the Swiss Dot folder. I then cut a wedding cake using the From My Kitchen Cricut Cartridge by cutting the layer cake image in three different sizes. The paper was so pretty that all I had to do was add colored rhinestones to the blossoms in this designer paper from K&Company. I used pop dots to make the cake the focal point of the card. White ribbon and a simple sentiment completed the card. This is a simple yet elegant card which I really thought turned out well.

Magnolia Shaped Card


There is still a few days to enter an interesting challenge hosted by Totally Tilda. I will enter my card before their deadline the August 14th deadline. They asked crafters to create a card that is not a square or rectangle or an easel. What's left? Well, how about a triangle! Yeah, I know - sounds different doesn't it? I started the card with some lovely designer paper from K&Company in their Best of Brenda Watson collection. It is a lovely pastel plaid that I thought would be great as the main paper. This was edged with co-ordinating paper in pink polka dot which I then scallop punched. I found the sentiment "sweetie pie" in another paper in the same paper pad so I cut it out and tucked it behind the Magnolia image which I colored using my copic markers to complement the plaid paper. Three small blossoms with pearl centres completes the card. I mounted everything onto plain white cardstock so that the card opens at the bottom right corner. Any little girl would love to receive this card for her birthday or just because.

Tuesday, August 10, 2010

Ribbon Lampshade Project


I saw this project on the American Craft Studio blog and I just had to pass along the image. I thought it was wonderful and certainly something that anyone could make. You could even make a smaller version for a baby's room. You could select colors that would suit the room and make a variety of die cuts. The lampshade can be as elaborate as you want to make it. If there was a little girl or baby in my family, I would certainly make something like this.

Monday, August 9, 2010

"Sweet Friend" Sundae


I survived another very hot week but not until my thoughts turned to ice cream! Now that's dangerous so I put my thoughts into action and made this very simple card. I cut out the sundae using my Cricut From My Kitchen cartridge and then added Stickles to the topping to give is some sparkle. I used my new Martha Stewart border punch (tiny scallops) on the bottom of the card and added a piece of cute pink polka dot paper behind it. I also added Stickles to the scallops to give more sparkle to the card.

By making this card, I kept my focus off ice cream. I call that a success!

Tuesday, August 3, 2010

Magnolia Hello


When I started my blog and visited sites from crafters worldwide, I couldn't get over the lovely cards and crafts created around the lovely Magnolia images. It seems that Magnolia stamps have a dedicated following. From what I have observed, crafters who use these stamps create images and backgrounds on their cards that are often very detailed and breathtaking. I really didn't know what the hoopla was all about until I got my own Tilda Magnolia stamp. Although the cute Tilda, Edwin or baby Tingla images don't have noses or mouths, the expression of the stamps is captured in the poses as well as from their costumes. While I am not one to create what some might consider fussy or overly embellished cards, I can appreciate the creativity and hard work of others as well as the time it takes to create such projects. There are some of you out there who are very opinionated and have voiced their dislike of Magnolias. While I am not fond on certain stamp lines, I would never go so far as to express my feelings as strongly as some do.

Interestingly, I was surprised at how much I enjoyed reading the Magnolia Ink Magazine which is published in Sweden. There are tutorials on coloring these images, new product descriptions, contests and winners, spotlight on crafters, project instructions and general articles about everything Magnolia. The coloring of these stamps is truly wonderful and flawlessly done. For now, I'll have to be satisfied with having only one Magnolia but I can't help but admire them from afar.

This card was entered into the following challenges:
1. Just Magnolia Challenge Blog - Week #66, Bev's Sketch

Monday, August 2, 2010

Thanks


I don't think enough people receive thank you cards. I had a recent visit from a couple whom I hadn't seen in a while so after they left, I made this quick card. I appreciated that they went out of their way to visit and I acknowledged that I thoroughly enjoyed their company and that they brought a lovely bottle of red wine to dinner. I hope they have an opportunity to visit more often in the future.

This project started with a square 4" x 4" card where I embossed the face of the card using my Cuttlebug folder and then pounced ink over the raised area. The glittered letters that spelled THANKS was placed front and centre with pop dots before I added the satin flower ribbon to the sides of the card.

I liked the way the card turned out.